Workflow · Blender, 3ds Max, Rhino
Modelling landscape topography that doesn't look like a wedding cake
Most rendered sites look like the building is sitting on a stack of layer cakes. Here's how I actually handle hillside grades so the image reads as real terrain.
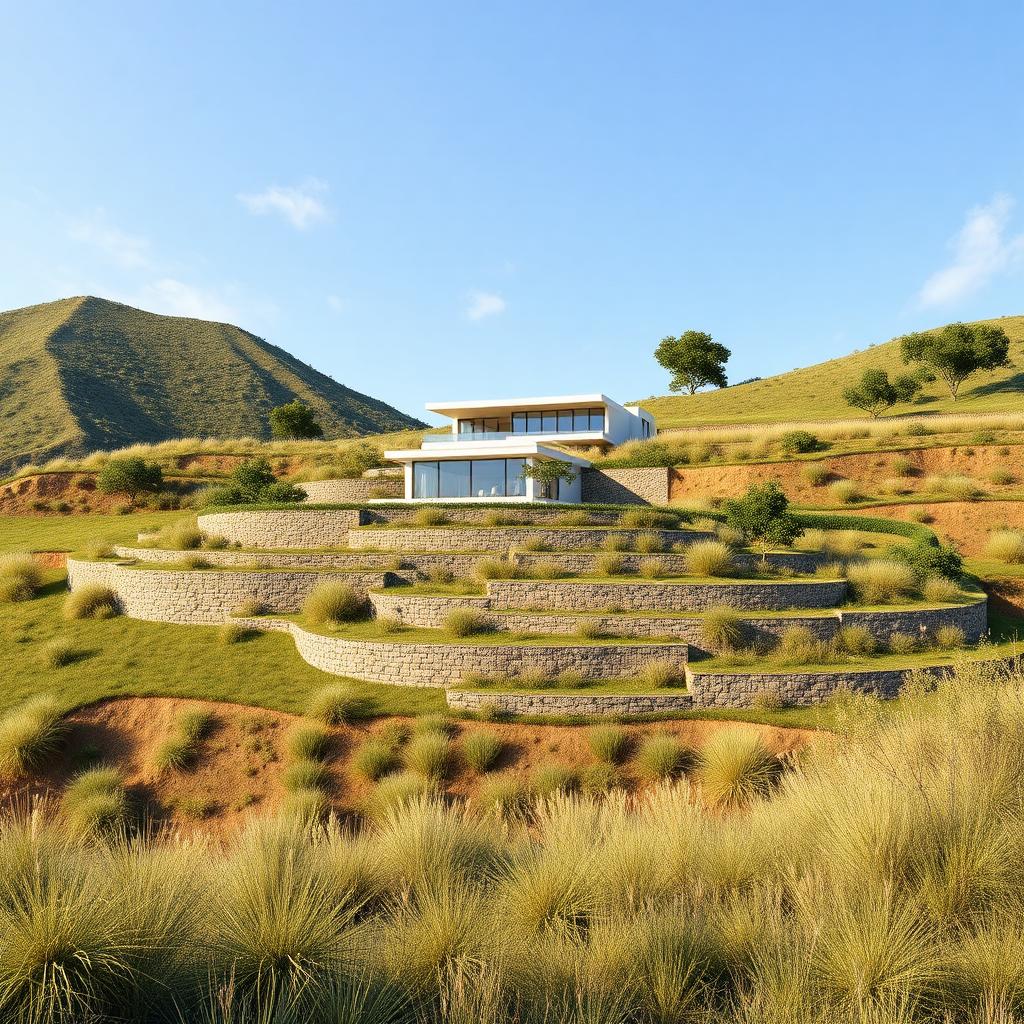 WORKFLOW
The tell is always the same. Perfectly parallel horizontal layers stacked on top of each other, no variation, no erosion, no plant colonisation on the edges. The site model looks like it came out of an early 2000s CAD tutorial because it did. And unfortunately most architects still hand us site plans as clean contour lines exactly like that, so if you use them straight you get exactly that result. Here is my process for turning a contour line CAD file into a site that reads as real land.
Step one is import the contours as splines and use a terrain generator to build the surface. In 3ds Max the built in Terrain compound object handles this. In Blender I use the Blender GIS add on or just a script that lofts a mesh between spline pairs. In Rhino the Patch command with the contour curves as input gets you 80 percent of the way. Result is a clean mesh that follows the architect's grading exactly, which is what the architect will want to see in review.
Step two, and this is the one people skip, is add a subtle displacement to that surface using a mixed noise texture. Perlin noise at low frequency with an amplitude of 100 to 200mm depending on scene scale. This breaks up the mathematical smoothness of the CAD contours without changing the underlying grade the architect designed. From above the surface still matches the site plan. From an eye level render camera it now looks like real ground that has settled and been walked on.
Step three is vegetation, and this is where most people undersell the image. Real hillside terrain is not a uniform lawn. It has taller grass along the drainage lines where water collects. It has clumps of shrubs on the level areas. It has rocky exposure on the steep faces where soil has slid off. I use Forest Pack or Scatter with three or four different distribution rules driven by slope angle and drainage patterns. The rules take an hour to set up and they are the difference between the site reading as designed landscape and reading as actual terrain.
Rocks and exposed soil are the finishing move. On any slope over about 25 degrees, real hillsides show exposed rocks and patches of bare earth because vegetation cannot hold on. I scatter medium and small rocks into these zones based on a slope map, plus I use a mix shader on the ground itself that reveals a bare soil texture where the slope exceeds a threshold. This one addition probably does more to sell a hillside render than anything else in the scene.
Retaining walls, if the project has them, are a hero opportunity most people underdesign. A dry stone retaining wall with real gaps between stones and a bit of moss along the base is one of the most beautiful things you can put in an archviz image. Model at least the front row of stones properly, use displacement for the interior, and put a subtle vertical color gradient on the material to darken the base where moisture would collect. Retaining walls done well often become the composition anchor of the image.
One last technical note. If your terrain covers a large area, use a level of detail approach. High density mesh in a 30 meter radius around the camera, lower density beyond that, then a low res backdrop card for the far background. This keeps your render times sane and it lets you push the foreground detail as high as it needs to go without paying for that detail in areas the camera cannot really see.