Lighting · V-Ray
Backlit and translucent materials: rendering onyx, glass block and stretched fabric ceilings
Backlit stone, glass block and luminous ceilings are some of the most requested and most botched effects in interior visualization. A practical guide to translucency, light sources behind the surface, hot spots, and keeping the glow believable.
 LIGHTING
Translucency is a lighting problem before it is a material problem
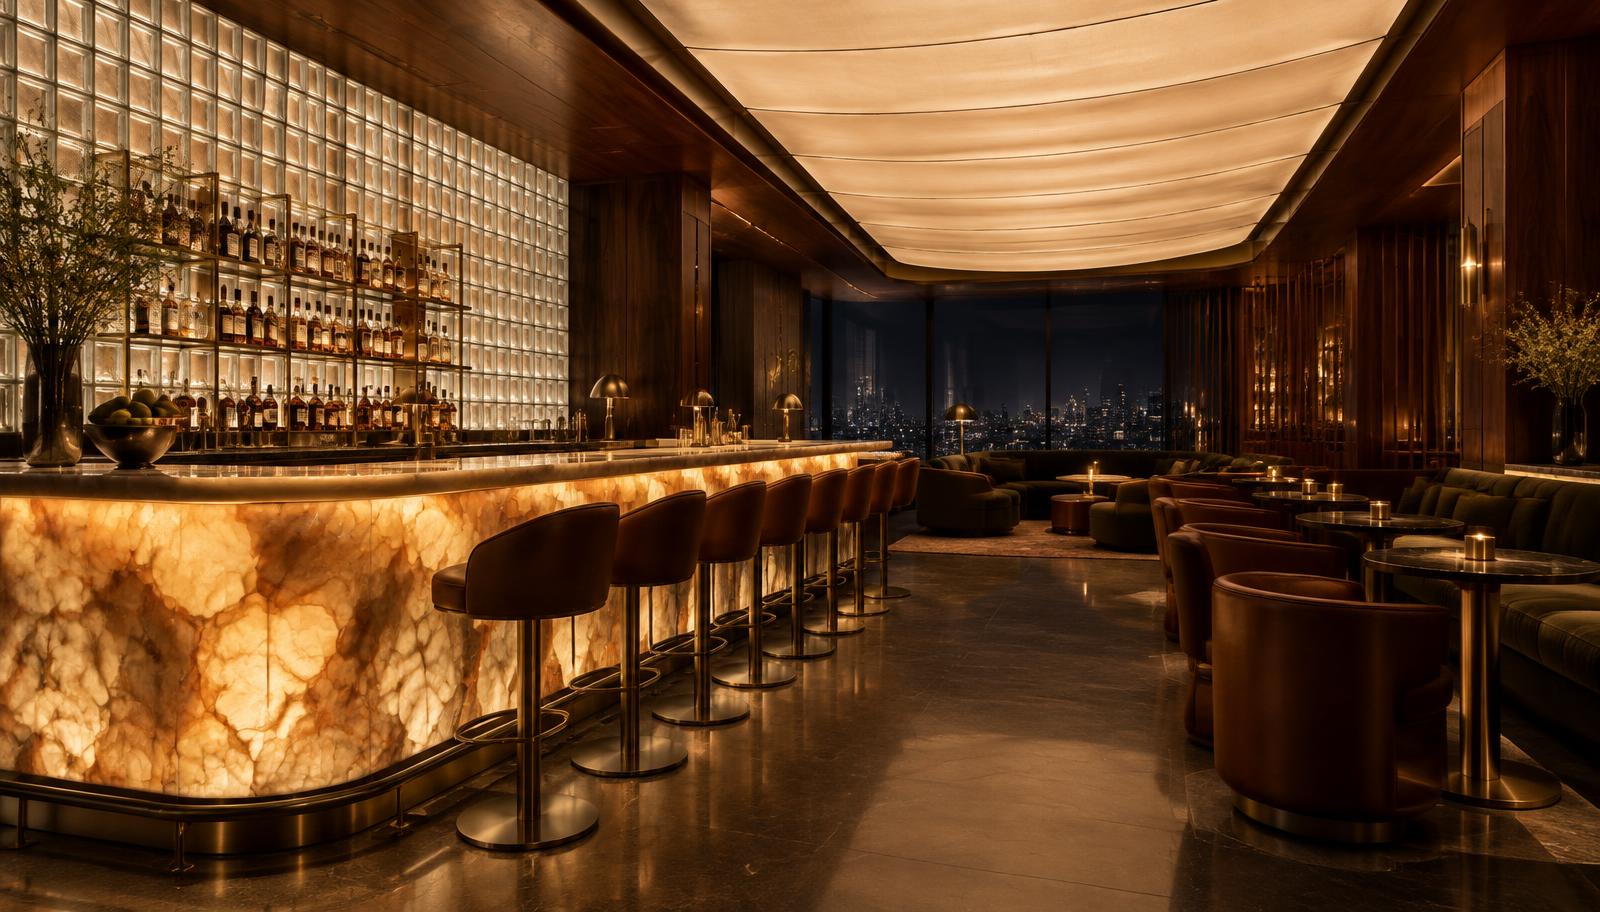
Every backlit surface is two things at once: a material and a light fixture. Artists who treat it as only a material end up with a flat emissive texture that glows like a television screen. Artists who treat it as only a light end up with an even, sourceless wash that could be a white wall. The convincing version needs both: a real light source behind the surface, at a plausible distance, shining through a material that absorbs, scatters and colours that light unevenly. Get that relationship right and the effect almost builds itself; get it wrong and no amount of post work will save it.
Start by asking how the real detail is built. A backlit onyx bar is a stone slab with a lightbox behind it: LED panels or strips, a diffuser, an air gap. A glass block wall is lit from a cavity or from the room behind. A stretched fabric ceiling is a membrane over a cove of LEDs. Model the cavity, even crudely, and place actual light sources inside it. The depth of that cavity controls how the light spreads, and it is the single most important dimension in the whole effect.
Backlit onyx: the stone does the grading
Onyx works because the stone itself is the diffuser and the colour grade. Its veining is not surface decoration; it is variation in density, so light passes through the pale areas and stalls in the dark ones. That means the texture must drive transmission, not just diffuse colour. Use the same onyx map to modulate how much light passes, so dense veins read darker from within rather than painted on top. A uniform emissive plane with an onyx texture on the front face is the classic failure: the veins sit on the surface like a sticker and the glow has no depth.
Keep the stone's front surface alive as well. Backlit onyx still has a polished face that catches reflections from the room: the bar top, the bottles, a passing highlight. If the material is pure transmission with no reflection, it reads as a lightbox print. A thin glossy layer over the translucent body gives you both, and the interplay between the internal glow and the external reflections is what makes the material feel like stone rather than plastic.
Glass block: diffusion with structure
Glass block is a different discipline: the blocks are structural, and the light behind them is usually softer and more even. The realism lives in the joints and the distortion. Model the mortar or silicone joints as real geometry with real shadow, give each block its subtle moulded face pattern, and let the glass refract and blur whatever is behind it. A perfectly clear block wall looks wrong; a perfectly opaque one looks like tile. The target is a wall where you can tell something is lit behind it, where brightness varies gently across the field, and where the grid of joints gives the glow a rhythm.
Watch the block edges at grazing angles. Real glass block catches bright rims where the face meets the reveal, and those rims are what separate the wall from its surroundings in a dim room. If the wall merges into a general haze, increase the contrast between the block faces and the joints rather than raising the overall brightness.
Stretched fabric ceilings: the softbox that is also architecture
A stretched backlit ceiling is essentially a building-scale softbox, and it should be treated with the same respect as a photographic one. The membrane scatters light broadly and evenly, which means it becomes the dominant light source in the room whether you planned it that way or not. That is a gift for rendering: one well-built luminous ceiling can light an entire bar or lobby with soft, shadowless ambience. It is also a trap, because perfectly even light flattens everything it touches.
Introduce deliberate unevenness. Real stretched ceilings have seams, slight sag, and LED arrays that are never perfectly uniform. A gentle large-scale brightness variation across the membrane, a subtle warm-to-neutral gradient, and visible seams at panel boundaries keep the ceiling readable as a physical object. And because the ceiling is doing the lighting, check what it does to the rest of the room: faces, tabletops and flooring should all show that soft top-down modelling.
Kill the hot spots
Hot spots are the signature of a fake. They happen when the light source is too close to the translucent surface, too small, or too bright, so individual LEDs or strips read through the material as bright blobs or stripes. The fixes are physical before they are numerical: deepen the cavity, add a diffusion layer between source and surface, and use more sources at lower intensity rather than fewer at higher. If your renderer supports it, a light with a real area and a soft falloff behind a transmission material will always beat an emissive texture pushed hard.
Check the edges and corners of every backlit panel. Light leaks at the perimeter, where the glow escapes around the frame, are realistic in small doses and disastrous in large ones. A thin bright line at a panel edge reads as craftsmanship; a flood of spill on the adjacent wall reads as a modelling error. Frame the panels with real reveals so the light has somewhere believable to stop.
Balance the glow against the room
A glowing surface is the brightest thing in the room by definition, so everything else must be exposed against it. The common mistake is letting the backlit feature blow out to white while the room sits in murk, or lifting the room until the feature no longer reads as luminous. Expose so the translucent surface holds its colour and texture at the top of the range, just below clipping, and let the room fall a stop or two below it. The contrast between the glow and the shadowed room is the drama the client is paying for.
Colour temperature discipline matters more here than anywhere. A backlit onyx wall is warm by nature; fighting it with cool room light can work beautifully as a deliberate contrast, but a random mix of temperatures reads as a mistake. Pick the glow's temperature, commit to it, and let the room's other sources either match it or contrast with it on purpose.
Test at final resolution and delivery size
Translucency artifacts hide at draft resolution. Fireflies in the transmission, noise in the scattered light and banding in the glow gradients often only appear, or only disappear, at final quality settings. Run at least one region render at full resolution through the brightest part of the backlit surface before committing to a final. Then check the finished image at delivery size: a glow that looks rich on a calibrated monitor can band badly after compression, and a subtle veining pattern can vanish entirely at thumbnail size. The backlit feature is usually the hero of the shot, so it deserves the same final-check discipline as the composition itself.