Lighting · Corona Renderer
Why your interior render looks flat, and the contrast ratio fix
Flat renders are almost never a sampling problem. They are a light ratio problem. Here is how to build a proper key, fill, and bounce hierarchy so an interior reads with depth.
 LIGHTING
Almost every week someone posts an interior render with the caption that it looks flat and asks whether the sample count is too low. It is not the sample count. Noise and flatness are unrelated problems. A flat image is one where too much of the frame sits inside a narrow band of brightness, so the eye has nothing to travel between. You can render that same image for eight hours and it will be a clean flat image.
The useful mental model comes from photography. Every lit space has a key, a fill, and a bounce. The key is the dominant source, usually the window. The fill is whatever softens the shadow side. The bounce is the light the room throws back at itself off floors, ceilings, and walls. Flatness happens when the fill creeps up until it is nearly as strong as the key, which is exactly what happens when an artist keeps adding invisible area lights to brighten dark corners.
A reliable starting point for a daylit residential interior is a key to fill ratio somewhere between 4:1 and 8:1. Read that in stops rather than percentages. Two to three stops of separation between the window wall and the shadow wall gives you a room that feels like a place at a time of day. Below two stops it looks like a showroom. Above four stops it starts to look like a nightclub unless that is the brief.
Measuring the ratio is easier than most people expect. Render a small region, drop the image into your compositor, and sample the luminance of a mid grey surface in the key zone and the same material in the shadow zone. If the values are 0.42 and 0.31 you have a flat image and no amount of curves work will save it. If they sit around 0.45 and 0.09 you have a picture. Do this before you spend three hours on furniture placement, not after.
The most common cause of collapsing ratios is the fill light habit. An artist sees a dark corner, adds a 2 by 2 meter invisible area light at low intensity, and moves on. Six corners later the room is lit from everywhere and nowhere. If a corner genuinely needs lifting, ask what would lift it in the real building. A lamp, a reflective surface, a second opening, a lighter floor finish. Any of those is a design answer. An invisible rectangle floating near the ceiling is a bandage.
Bounce is where interiors get their believability, and it is controlled by material albedo, not by light count. A white oak floor at 0.55 albedo throws a warm wash across the underside of furniture. The same room with a dark stained floor at 0.12 will read twice as moody with identical lighting. Before adding a single light, check your albedos. Anything above 0.8 is almost certainly wrong. Real white paint measures around 0.75 to 0.8, and pure white walls in a render are the fastest route to a washed out frame.
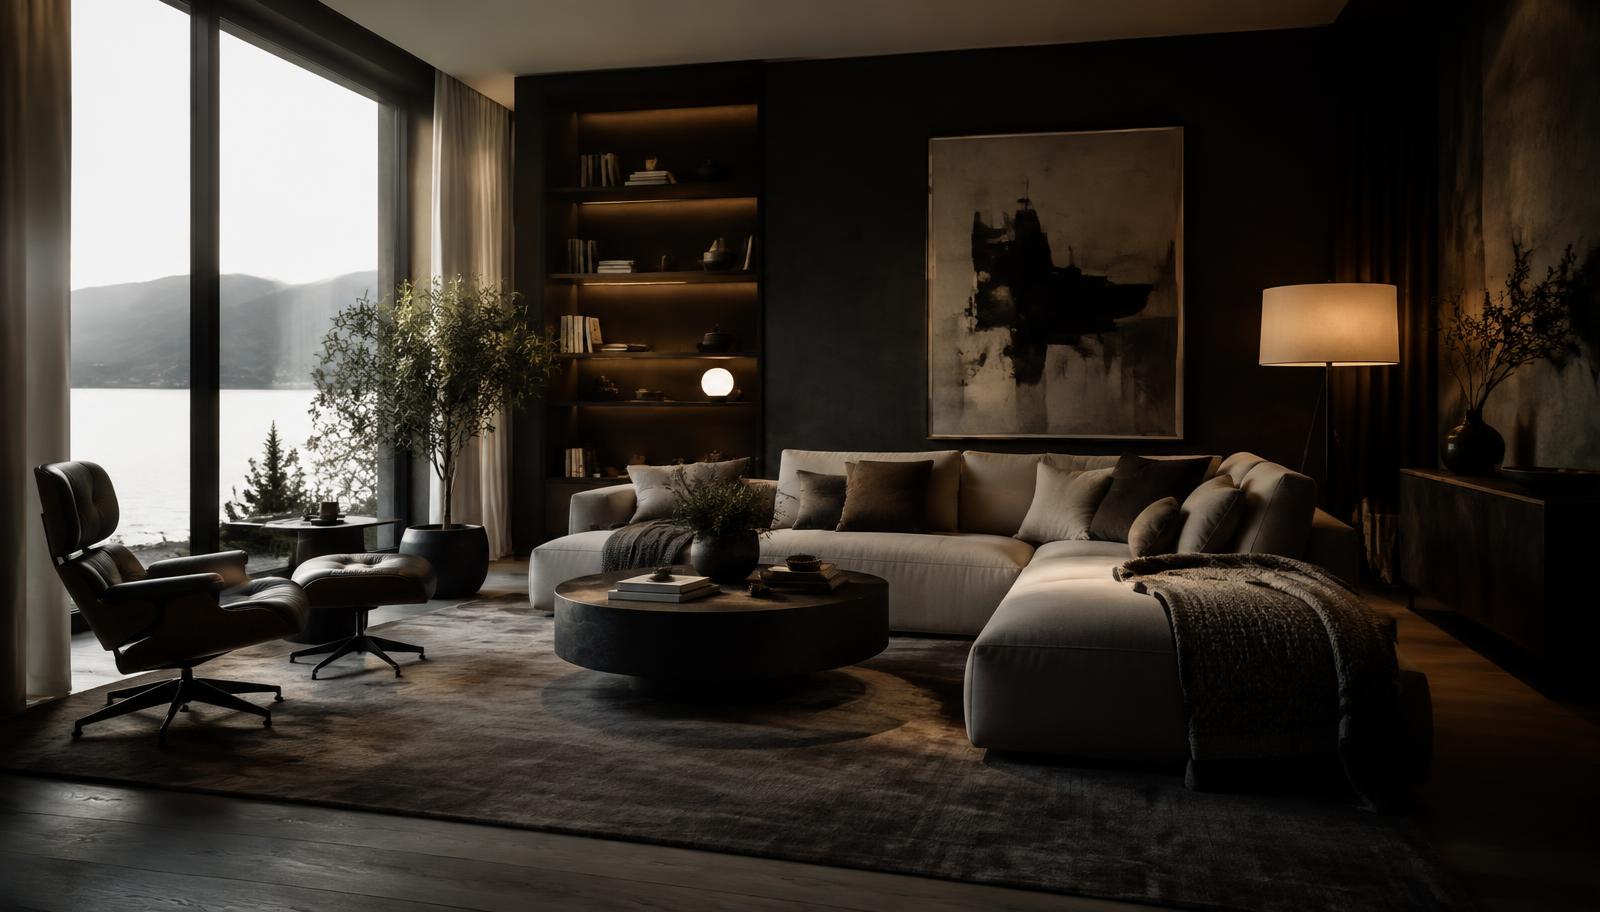
The 3599K interior sources in this scene are doing something specific. They are not lifting the room to a comfortable overall level. They are marking the dark half of the frame with small, warm, high value points so the eye has somewhere to land after it enters through the window. That is the compositional job of artificial light in a daylit render: punctuation, not illumination.
Camera exposure is the other half of the equation and it is where people accidentally flatten their own work. If you set exposure so that nothing clips, the brightest part of your image sits at 0.85 and the picture has no white in it. Real photographs of interiors almost always clip the window view. Let the exterior blow out by a stop or two. That clipped window is what tells a viewer the interior is darker than outside, which is the whole point.
Tone mapping is the last lever and the most abused. A filmic curve with a proper shoulder will hold the highlight roll off while keeping your shadows deep. A linear curve with a manual S applied in post tends to produce crunchy midtones and muddy blacks. Set the curve at the render stage and treat post as refinement rather than rescue.
One practical exercise: take a render you think is flat, turn off every light except the primary window, and look at it. Most artists find that version more convincing than the fully lit one. From there, add sources back one at a time and stop the moment the shadow side loses its shape. The right number of lights in an interior is almost always fewer than you think.
Depth in a render is not a post effect. It is decided in the first twenty minutes of lighting, when you choose how much darker one half of the room is allowed to be. Protect that decision and the rest of the image gets easier.