Workflow · V-Ray
Render elements and passes: what to export and what to do with them
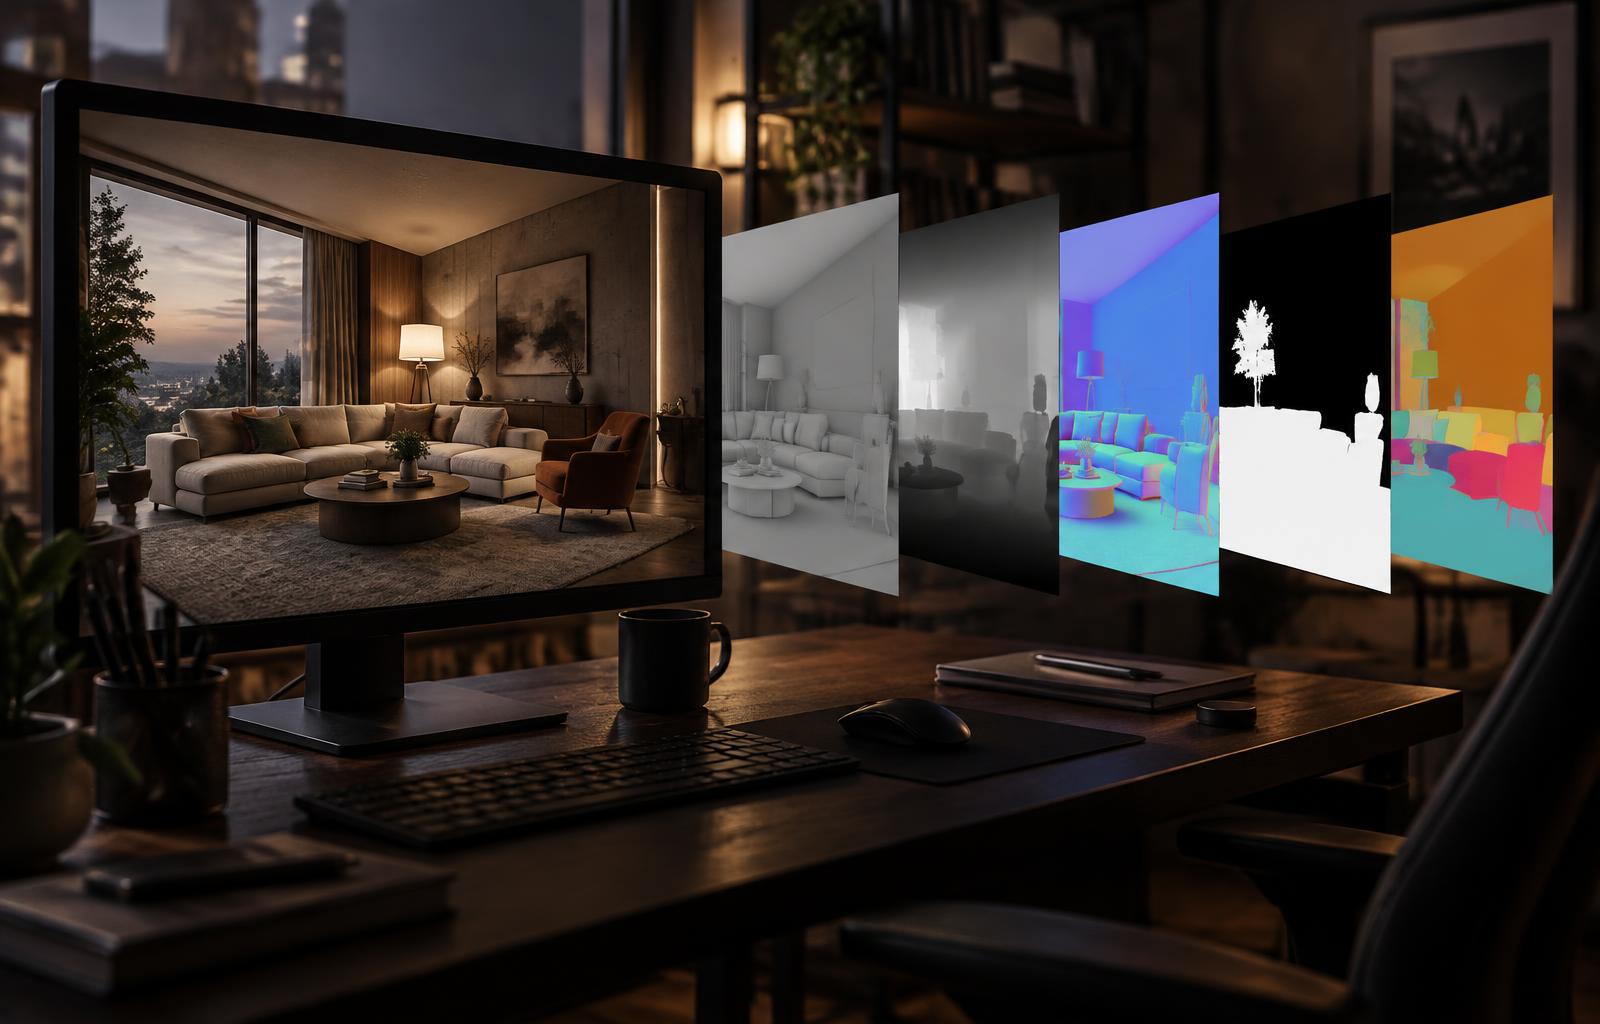
Depth, normals, material IDs, light mix and ambient occlusion turn a ten minute fix into something other than an overnight re-render. The pass set worth exporting from V-Ray, Corona and Blender, and the ones to skip.
 WORKFLOW
Why passes exist
A pass is a separate image containing one ingredient of the final render, and the reason a studio exports them is simple arithmetic. A re-render of a still at four thousand pixels takes hours. A change made from a pass takes minutes. Across a project with six images and four revision rounds, the difference is measured in days of schedule, which is why the artists who never seem to wait for renders are usually the ones whose output folders are the most crowded.
The catch is that a pass is only worth exporting if something downstream uses it. A folder of thirty unused elements costs storage, costs render time and creates the illusion of preparedness. The useful discipline is knowing which handful of passes you will actually reach for, and exporting those on every frame, every time, without thinking about it.
The set worth exporting every time
There is a short core set that earns its place on almost every architectural frame: beauty with alpha, depth, normals, a material or object ID, a lighting split, and a modest ambient occlusion. Everything else is conditional on the scene. Export those six consistently and most client changes become compositing jobs, and the frames that genuinely need more can get more.
Beauty and alpha come first and sound trivial, but the alpha is the pass most often forgotten on the final version of a frame after being present on every draft. A render with a clean alpha drops into any layout, composites over a different background, or builds a mask. Render it as a single channel with the same antialiasing settings as the beauty, because an alpha rendered with different thresholds gives you a fringed edge to clean up by hand.
Depth and what it is actually for
A depth or Z pass stores distance from the camera as brightness, near white and far black in the usual convention, and it is the most versatile single image in the set. It drives fake depth of field, it drives atmospheric haze in post, and it makes gradient masks: a selection that fades with distance, a fog that thickens towards the back of a courtyard, a subtle desaturation at the far end of a corridor. None of those need a re-render, and all of them need the depth pass.
Two cautions. Depth values are only meaningful relative to the scene, so note the near and far clamp when you export, and never mix depth from two different cameras in one composite. And in V-Ray and Corona the depth pass behaves differently around glass and thin geometry, so check a frame with a large window before you rely on it for a haze effect, because the glazing can hand you a depth value from the far side of the pane.
Normals, the most underused pass
A normal pass stores the direction each surface faces as a colour, usually in the lavender and mint range that looks like nothing until you need it. Its practical use is relighting and repair. You can push a light direction in post without touching the scene, add a soft directional highlight to a wall that came out flat, or fix a shader whose normal map was tiled the wrong way. For archviz specifically, it is also the cheapest way to give large plain surfaces a hint of directional life without a re-render.
Normals also make excellent masks. A selection of surfaces facing up is one arithmetic operation on a normal pass, and that selection is the basis of a dust effect on horizontal surfaces, a snow effect on a roof, or a slight brightening of soffits. It takes a moment to set up and it is repeatable across a whole set of frames.
Material IDs and cryptomatte
A material or object ID pass assigns each surface a flat, distinct colour so it can be selected instantly. In V-Ray and Corona this is a material ID or material selection render element; in Blender and Cycles, object buffers or asset metadata; and across all of them, cryptomatte has become the standard because it derives masks automatically from object and material names and stores them inside the EXR.
Cryptomatte changes a working habit rather than just adding a file. Because masks come from names, the naming discipline you should already have had becomes the thing that makes post fast: a layer called plaster_wall_01 selects in seconds, and Object_4782 never will. It also means a mask survives a change of shader, which a hand painted selection does not, and that a colleague can isolate the oak floor without opening the scene.
Light mix: the pass that saves the most time
The lighting split is the pass that most often converts a skeptic. Corona's LightMix and V-Ray's light mix render element record the contribution of each light group separately, so one render produces a file in which the sun, the sky, the interior practicals and the accent strips can each be re-weighted afterwards. The client who wants the room warmer, the lamps brighter and the window slightly less dominant is asking for a slider movement, not a re-render.
Two conditions make light mix behave properly. The lighting must be grouped honestly at the source, because six lights dumped into one channel are not separable, and the render must be noise-free enough that re-weighting a dim channel does not reveal its noise. A light that contributed almost nothing in the original render will look terrible when you push it up four hundred percent, which is a reminder that the mix is a balancing tool rather than a substitute for lighting the scene.
Ambient occlusion, specular and reflection
Ambient occlusion, specular and reflection passes are the classic trio and they still earn their place. Occlusion adds contact definition where a material is too even, and in archviz it is the fastest way to stop a white room looking like a plastic model. Specular and reflection passes let you tame a hotspot on a polished floor, darken glazing that has become a mirror of an ugly sky, or lift a reflection the environment failed to supply, all without re-rendering the diffuse information underneath.
The trap with occlusion is double counting. If the scene already has real global illumination producing soft contact shadows, an AO pass multiplied over the top darkens every corner twice and the room starts to look grimy. Use it where GI is expensive or weak, keep the radius tight, and blend at low opacity with a mode you can dial back.
Passes for animation and volume
For animation the set grows: motion vectors or velocity for motion blur and temporal effects, a separate emission pass for screens and signage you may want to swap or brighten, and a mist or volume pass if the scene contains fog, smoke or haze. A mist pass is also the cheapest way to give a deep interior or a long facade a sense of air, by driving a fog effect from the pass rather than from a volume in the scene, which is far cheaper to iterate.
Emission passes deserve a specific mention in retail, hospitality and any project with wayfinding or branding. A screen, a sign or a lightbox is often the element a client changes last and most often, and having its contribution isolated means the swap is a composite rather than a re-render of the whole frame.
How to store them
Storage format matters more than most artists think. A multilayer EXR keeps every pass in one file at its original floating point range, which survives grading, and it is what ACES based pipelines expect. The downside is that many viewers and clients cannot open it, so most studios keep a working EXR set and deliver a flattened TIFF or PNG of the beauty. Name files with the frame, the version and the pass in a fixed order, because the moment a project has six images and three versions, a folder that relies on memory stops being usable.
Keep passes matched to the beauty. Same resolution, same antialiasing threshold, same sampling philosophy, same denoise decision. A denoised beauty over a raw normal pass is a common and invisible mistake until someone tries to build a mask from the noisy pass and gets a mask with holes in it. If a pass is noisy enough to be a problem, the fix is more samples on that pass, not a denoiser that will smear its edges.
Recipes that pay for the storage
Most real requests reduce to three moves. To brighten a room without blowing the windows: use the light mix to lift the interior channels while leaving the sky channel alone, or mask by material ID and apply levels to the floor and walls only. To make a facade read as more solid: multiply a tight occlusion pass into the joints and let the sun channel keep the broad shading. To replace a material the client disliked: isolate it by ID or cryptomatte, then composite the new surface in using the depth and normal passes to keep the original contact shadows and lighting direction.
None of those recipes produce a perfect result, and the honest limit is worth stating. Pass-based fixes cannot invent occlusion that was never calculated, cannot correct a camera that is in the wrong place, and cannot make a bad material believable. What they do is handle the eighty percent of changes that are about balance, emphasis and one surface, and leave the re-render for the twenty percent that genuinely needs one.
What not to bother with
Skip a separate diffuse pass if you already have a material ID and a light mix, because you can reconstruct it. Skip a shadow pass on stills where GI already carries the contact shadows, unless you specifically want to re-weight shadows on their own. Skip caustics as a separate element unless you are rendering a pool and intend to move it. And skip the temptation to export everything just in case, because an untested pass is not a safety net; the only safety net is a pass you have actually used in a composite.