Lighting · V-Ray 7, 3ds Max
Wet streets and rain: night city renders that carry mood
Puddle maps, neon reflection, and the exposure trick that lets shopfronts glow. A working setup for cinematic urban night shots in V-Ray.
 LIGHTING
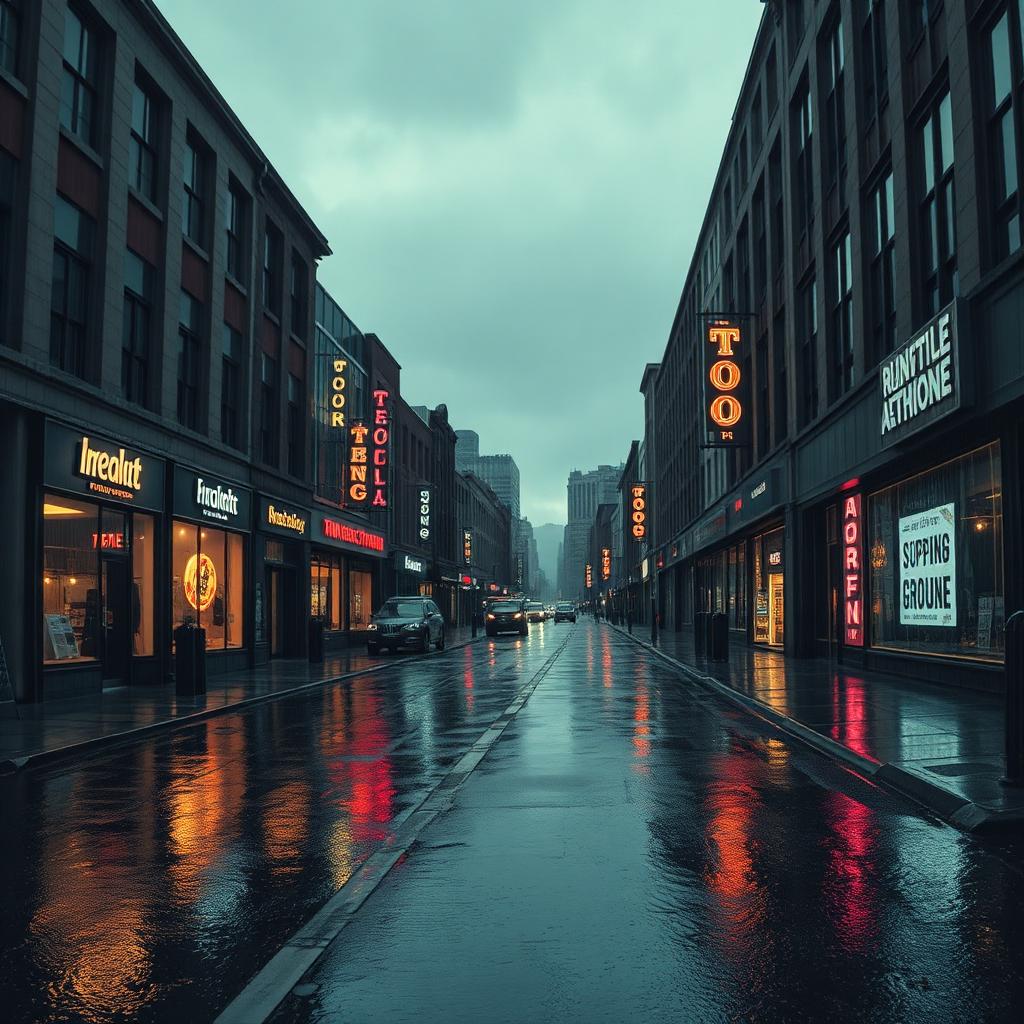
Wet streets are one of the great cheats in arch viz. Every mediocre urban render becomes cinematic the moment you add rain, because a wet ground plane reflects everything above it and turns the entire streetscape into a two storey composition. The trick is doing it convincingly. Most rain renders look staged because the wetness is uniform. Real rain leaves a street patchy, with puddles in the low spots and dry patches under the awnings.
The asphalt shader has to work in two layers. Base layer is your standard asphalt, diffuse around 0.15 dark grey with a low frequency variation map to break up the tiling. Wet layer sits on top through a VRayBlend material or a Corona layered material. The wet layer is essentially a mirror at low glossiness, reflection colour 0.95 grey, glossiness 0.6, fresnel IOR 1.33 because water. What controls the mix is a black and white mask that defines where the water sits.
The mask is where the shot lives or dies. A uniform grey mask gives you an evenly wet street, which reads as fake. Use a low frequency noise map with worley cells at a scale of about 2m, thresholded to give you distinct puddle shapes. Add a second higher frequency noise at 20 percent to break up the puddle edges. Paint by hand any puddles you want to place deliberately, such as one directly in the foreground catching the neon reflection.
For the neon and shopfront light, treat them as real luminaires with realistic values. A neon sign at 1500 lumens per metre of tube, colour temperature based on the gas fill so 2200K for warm white neon and 4200K for the classic red. A café window with warm interior at 2700K and about 400 lumens per square metre of visible area. The values matter because the wet reflection will amplify them. If you fake the neon at three times its real intensity, the reflection will burn out and look nothing like the reference photographs you were chasing.
Exposure is the setting that changes everything. A wet night street should be shot at low key. EV 6 to 7, which is dim by daylight standards but exactly right for a street lit only by shopfronts and street lamps. Do not fill it. Let the dark areas fall dark. Every wet street photograph you have ever admired has deep shadow, and the interest is in how the highlights punch through them.
Rain in the air is a compositing job, not a render job. Rendering individual raindrops is a colossal waste of time. Composite a rain plate over the final render at 30 to 50 percent opacity, and add a subtle motion blurred streak on any bright direct light source. If you want raindrops on a window in the frame, model those specifically as small distortion spheres, but do not try to render the whole atmospheric rain.
Sound reference matters here more than in most renders. When you look at a still image of a wet street, your brain fills in the sound of the tyres on wet asphalt and the drip from awnings. That is what you are working for. If the render looks silent, the wet is not doing its job. Move the puddle placement, boost the neon reflection, add a small pedestrian silhouette in the middle distance. Do whatever it takes to make the image feel like it has a soundtrack.
One last technical note. The gutter matters. Water pools at the kerb edge, not in the middle of the road. If your camera shows the crown of the road, make sure the puddles distribute correctly with more water at the sides and less in the centre. Getting this drainage logic right is what separates the renders that architects will screenshot from the ones that look like a set dressed movie shot.